How to send emails using Cloudflare WebWorkers and SendGrid
Getting Started
By the end of this blog, you would know how to
- Deploy a Worker on CloudFlare
- Send Transactional Emails using the previously built WebWorker
What is a WebWorker?
- A Web Worker is an asynchronous system, or protocol, for web pages to execute tasks in the background, independently from the main thread and website UI.
- It can be made to take actions on requests based on certain conditions, can be configured to deny requests even before actually reaching the origin server too hence can be used to configure Page Rules or a very basic WAF.
Prerequisites for follow-along:
- A domain managed by CloudFlare
- A SendGrid account
My Use Case
The current blog template I am using is Gatsby Starter from W3L. It also had a contact form along with it, which can be found here.
<form className="form-container" action="https://blog.amanbhargava.com/sendEmail" method="post">
  <div>
    <label htmlFor="name">Name</label>
    <input type="text" name="name" id="name"/>
  </div>
  <div>
    <label htmlFor="sender">Email</label>
    <input type="email" name="sender" id="sender"/>
  </div>
  <div>
    <label htmlFor="subject">Subject</label>
    <input type="text" name="subject" id="subject"/>
  </div>
  <div>
    <label htmlFor="message">Message</label>
    <textarea name="message" id="message"></textarea>
  </div>
  <div style={{display: "flex", justifyContent: "flex-end"}}>
    <input type="submit" className="button -primary" style={{marginRight: 0}} />
  </div>
</form>
As can be seen, it is a simple HTML form which posts the form submissions to https://blog.amanbhargava.com/sendEmail open clicking the submit button. Capturing Form responses has traditionally been a problem which needed a Web Server to solve but with the help of Serverless architecture (AWS Lambda / Serverless/ CloudFlare workers), we can deploy WebWorkers which replace the need for a server.
Creating First Web Worker
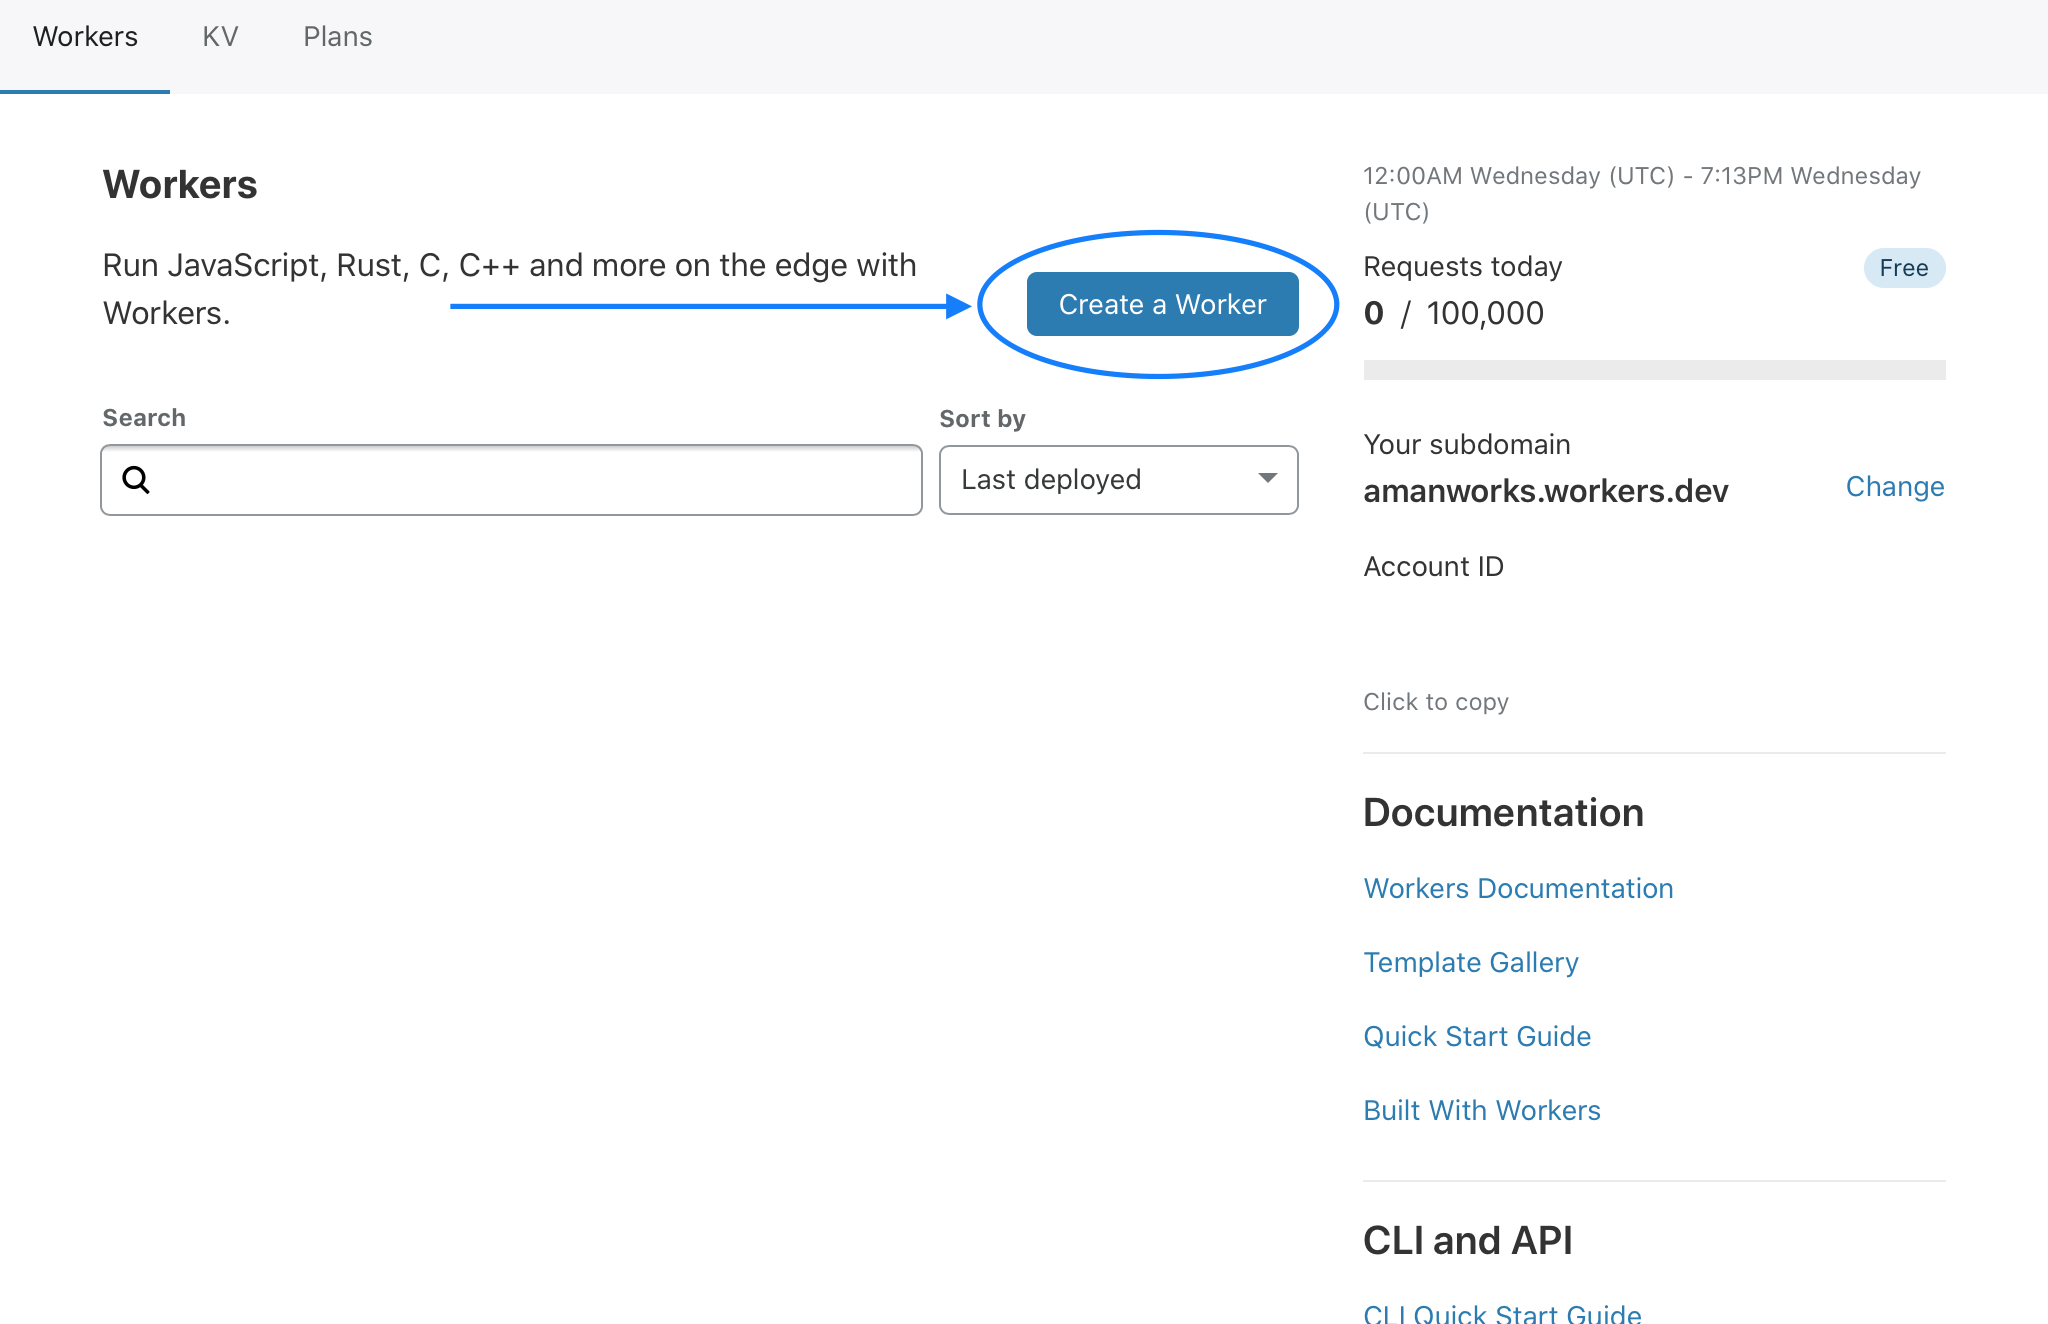
There are a couple of ways to get started by creating a Web Worker on CloudFlare, one may choose to use the Wrangler CLI to build a worker, or one may use the GUI to do it. One major difference is that you won't be able to use node_modules in the GUI, but for the purposes of this guide, the GUI will work. So head on over to https://dash.cloudflare.com/ and get to the Workers Panel.

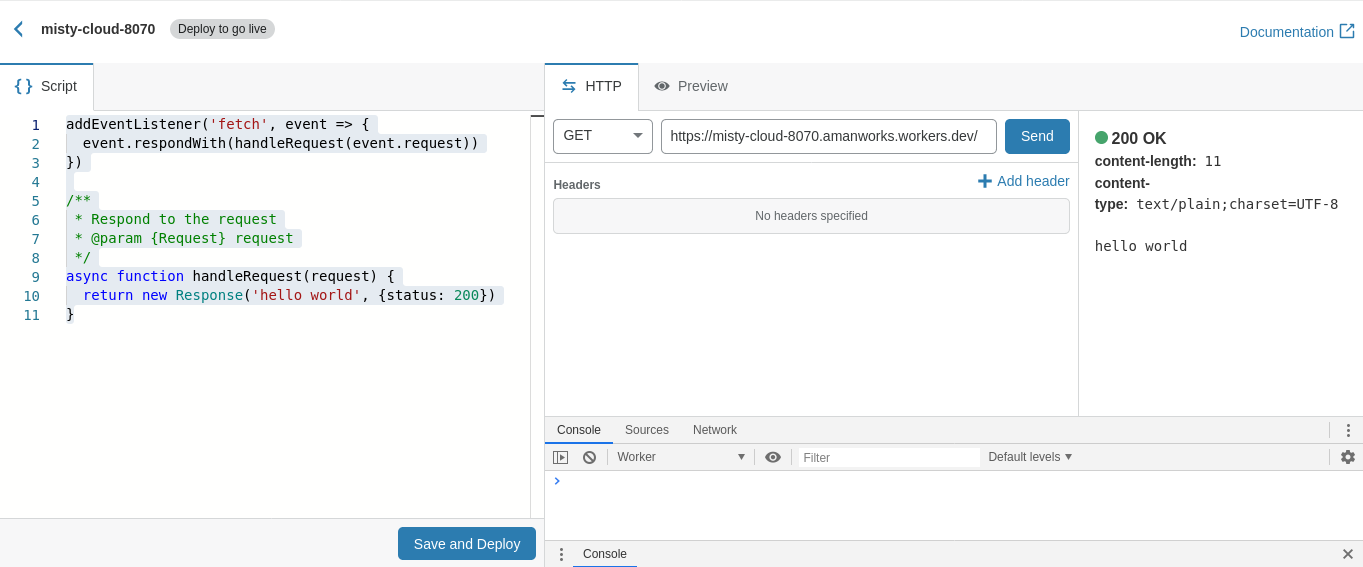
Upon creating a new worker, you will see a worker created with default code to respond to requests along with a GUI to send test requests to it.

We are adding an event listener to the Web Worker Context to listen for all requests and defining a handler handleRequest to handle these requests by returning a Response object.
addEventListener('fetch', event => {
  event.respondWith(handleRequest(event.request))
})

/**
 * Respond to the request
 * @param {Request} request
 */
async function handleRequest(request) {
  return new Response('hello world', {status: 200})
}
Capturing POST Request Data
We are gonna go ahead and first define separate event handlers for POST and GET.
/*
* ADD EVENT LISTENER FOR LISTENING TO REQUESTS
* */
addEventListener('fetch', event => {
  const { request } = event
  const { url } = request
  if (request.method === 'POST') {
    return event.respondWith(handlePostRequest(request))
  } else if (request.method === 'GET') {
    return event.respondWith(handleGetRequest(request))
  }
})
Since this Worker's only purpose is to send emails upon receiving a POST request, we are gonna set it to return 404 for GET requests(You can of course choose to make a different use of GET).
GET Event Listener
/*
* DO NOT WANT TO DO ANYTHING ON GET
* */
async function handleGetRequest(request) {
  return new Response('Object Not Found', {
    statusText: 'Object Not Found',
    status: 404,
  })
}
Request Body Parsing
Before we define our POST handler, we also need to parse form data from the request coming to us.
async function readRequestBody(request) {
  const { headers } = request
  const contentType = headers.get('content-type')
  if (contentType.includes('application/json')) {
    const body = await request.json()
    return body
  } else if (contentType.includes('form')) {
    const formData = await request.formData()
    let body = {}
    for (let entry of formData.entries()) {
      body[entry[0]] = entry[1]
    }
    return JSON.stringify(body)
  } else {
    let myBlob = await request.blob()
    var objectURL = URL.createObjectURL(myBlob)
    return objectURL
  }
}
POST Request Handler
To handle POST request, we will first parse the data by calling the function to parse data we defined above, once that is done, we will call our sendEmail function with the parsed params.
/*
* HANDLE POST REQUEST
* */
async function handlePostRequest(request) {
  let reqBody = await readRequestBody(request)
  reqBody = JSON.parse(reqBody)
  let emailResponse = await sendEmail({
    to: reqBody.sender,
    name: reqBody.name,
    subject: reqBody.subject,
    message: reqBody.message,
  })
  /*
  * REDIRECT USER TO A URL OF
  * CHOICE UPON COMPLETION OF EMAIL SENDING
  */
  return Response.redirect(url)
}
Click on save and deploy so we can proceed to adding envrionment variables.
Sendgrid Integration & Environment Variables
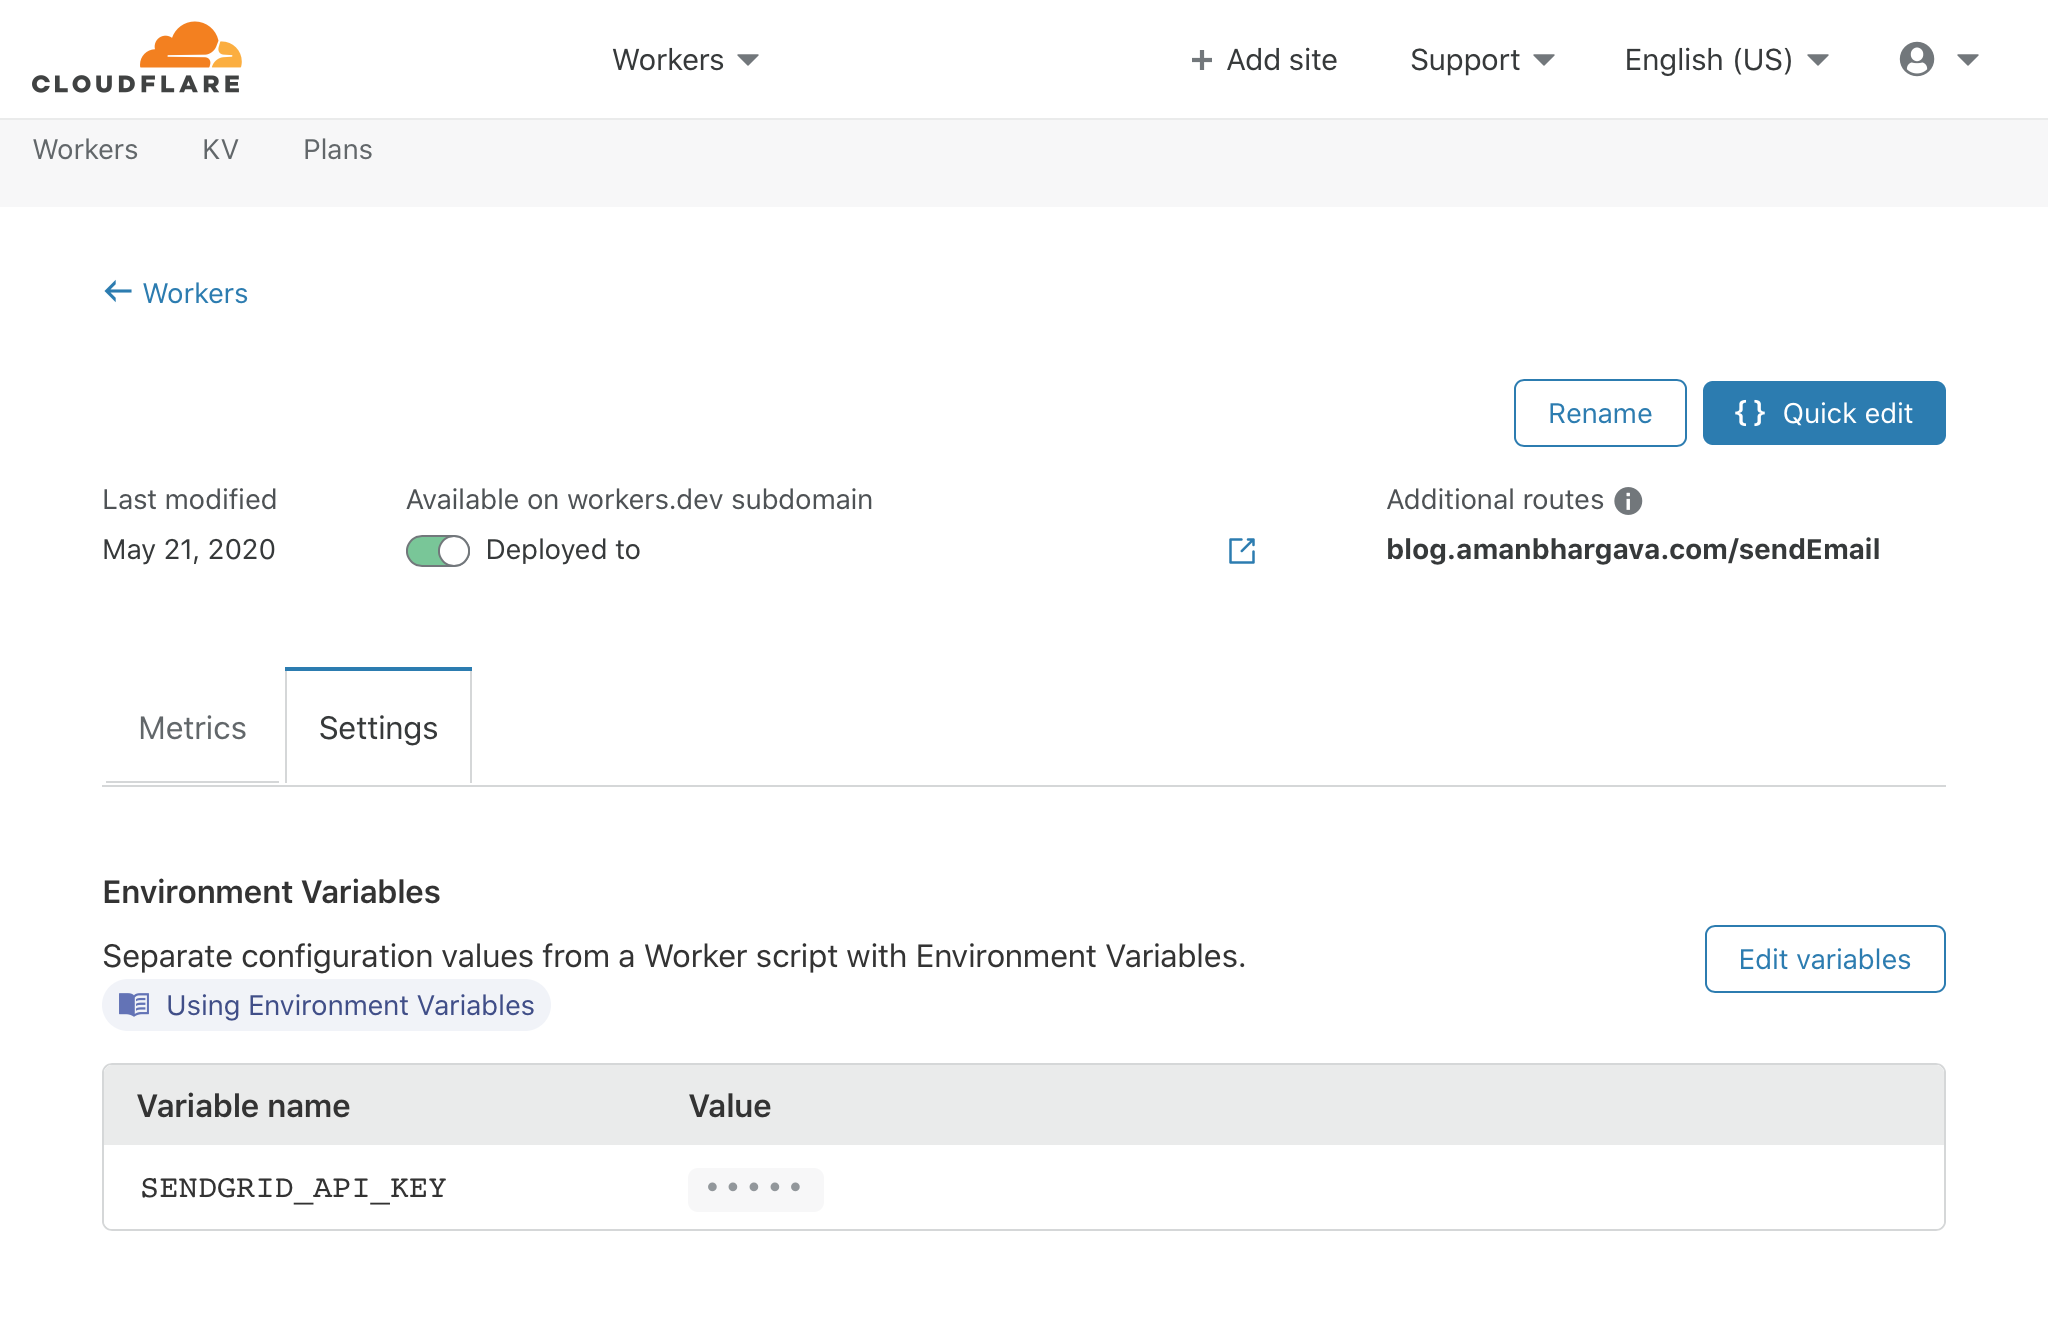
CloudFlare Workers provide us a way to add Environment Variables and to access them inside the Worker. To integrate SendGrid we need to do the following:
- Head on over to https://app.sendgrid.com/settings/api_keys to generate an API key.
- Go to Settings Page of your newly created worker and add the API key in a variable called
SENDGRID_API_KEY - Now
SENDGRID_API_KEYis directly accessible in the Worker Namespace and can be used directly in the global scope.

Defining Our Send Email Function
I am using SendGrid Templates to create dynamic emails whose body changes based on the dynamic_template_data object. I find Dynamic Templates are really easy to create by using the Drag and Drop tool to make simple emails. Create them here: https://mc.sendgrid.com/dynamic-templates.
async function sendEmail({ to, name }) {
  if (!to) {
    return Response.redirect(url) // handle errors here
  }
  const email = await fetch('https://api.sendgrid.com/v3/mail/send', {
    body: JSON.stringify({
      'from': {
        'email': '', // add your email here
      },
      'personalizations': [
        {
          'to': [
            {
              'email': to,
            },
          ],
          'dynamic_template_data': {
            'name': name, // dynamic variable value for SendGrid Template
          },
        },
      ],
      'template_id': '', // add template ID here,
      // templates can be created inside SendGrid and
      // can use variables
    }),
    headers: {
      'Authorization': `Bearer ${SENDGRID_API_KEY}`,
      'Content-Type': 'application/json',
    },
    method: 'POST',
  })
  return email
}
Gotchas:
- Keep in mind that free web workers are only allowed 10ms of Compute Time, so if your worker is taking longer than that to respond to a request, the request might just be dropped.
- Error handling is easily customizable, you can return the Status Code of your choices to the Front-End and respond appropriately for more full fledged use cases.
I sincerely hope this helps you in your next personal project or just as a starter point for WebWorkers. Let me know your thoughts on: [email protected]